In this post, we are going to see about the creation of a billing alert and enabling the alerts about free tier usage.
Services used:
| Service Name | Scope | Description |
| AWS Billing | Global | the service used to manage the monthly billings |
| AWS CloudWatch | Regional | the service that provides monitoring for AWS resources and the customer applications running on the Amazon infrastructure |
| AWS SNS (Simple Notification Service) | Regional | the service that automates the process of sending the notifications to the subscribers attached to it |
Step 1:
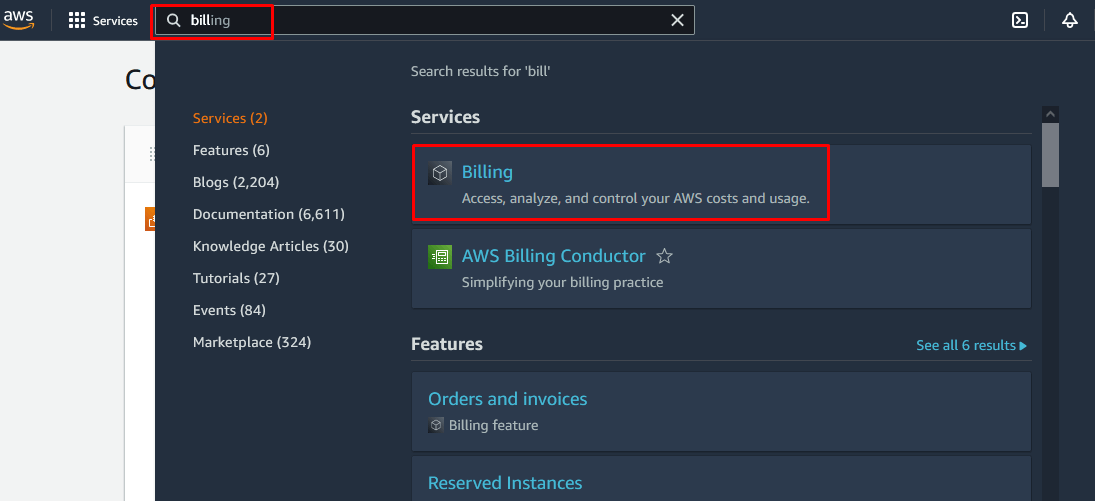
Go to AWS Console. In the search bar, type the word “billing“. From the filtered services, select the Billing service.
Step 2:
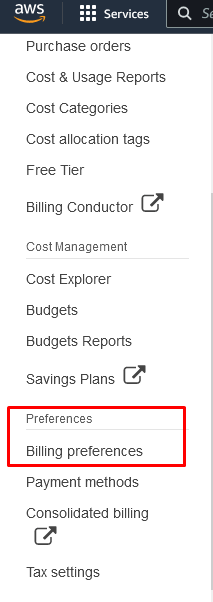
Under AWS Billing Dashboard, Select Billing Preferences under Preferences.
Step 3:
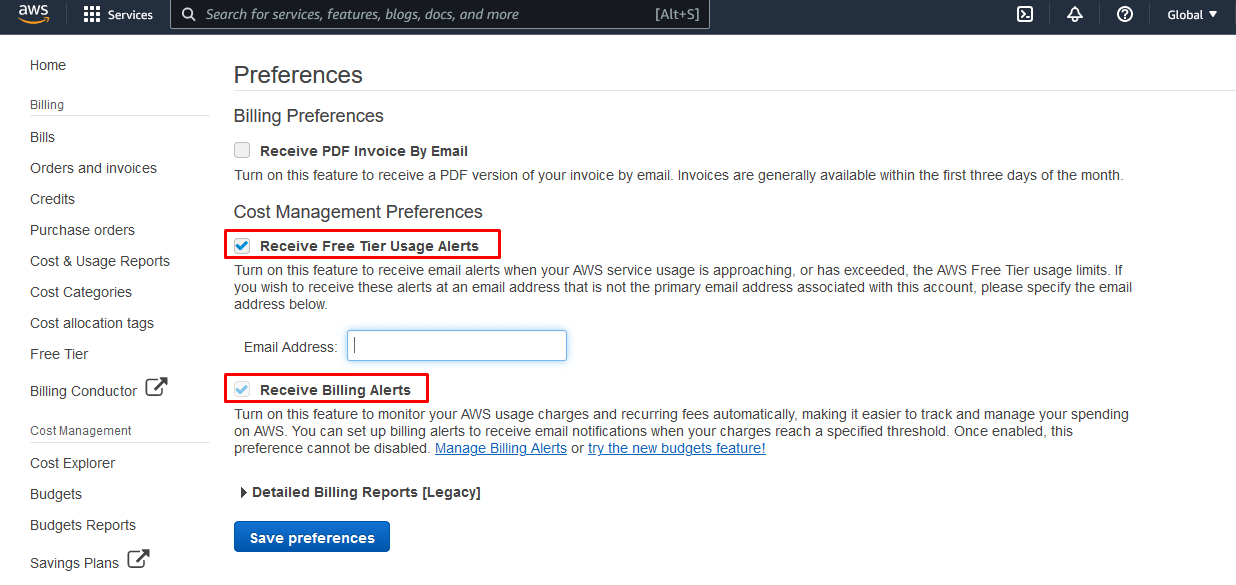
Select Receive Free Tier Usage Alerts, Receive Billing Alerts checkboxes, and enter the Email Address to which these alerts are to be shared. Click Save Preferences to save the updated preferences.
Step 4:
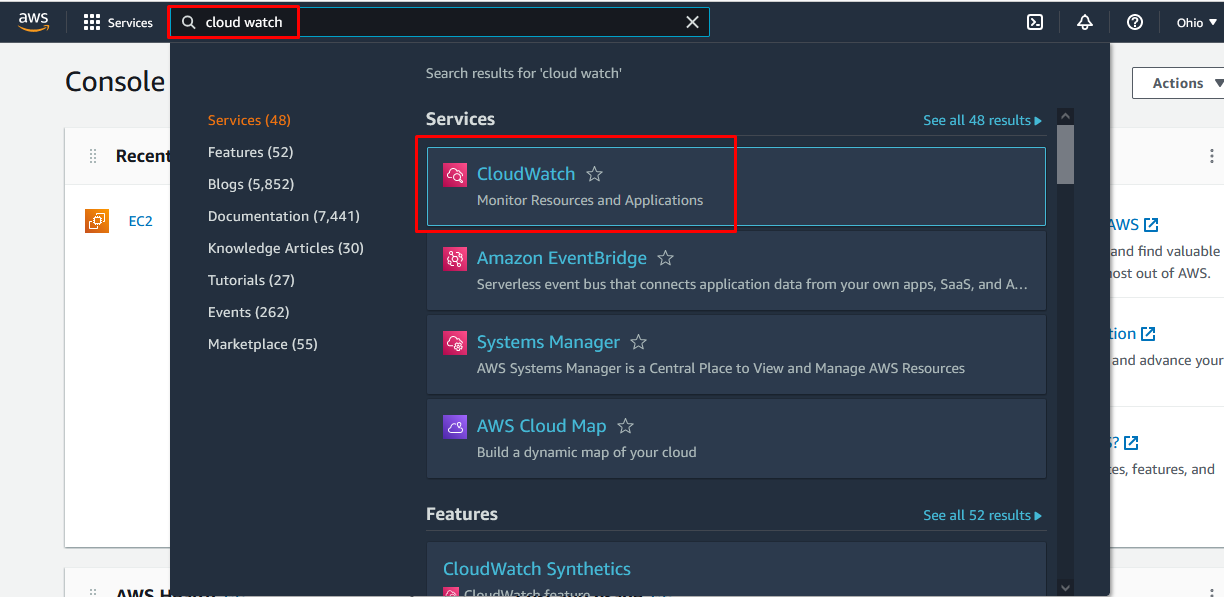
In the search bar, type the word “CloudWatch“. From the filtered services, select the CloudWatch service to open the CloudWatch console.
Step 5:
In the CloudWatch console, under the Alarms section, we won’t have the option to create any new billing alarms. The reason is that we are in the Ohio(us-east-2) region.
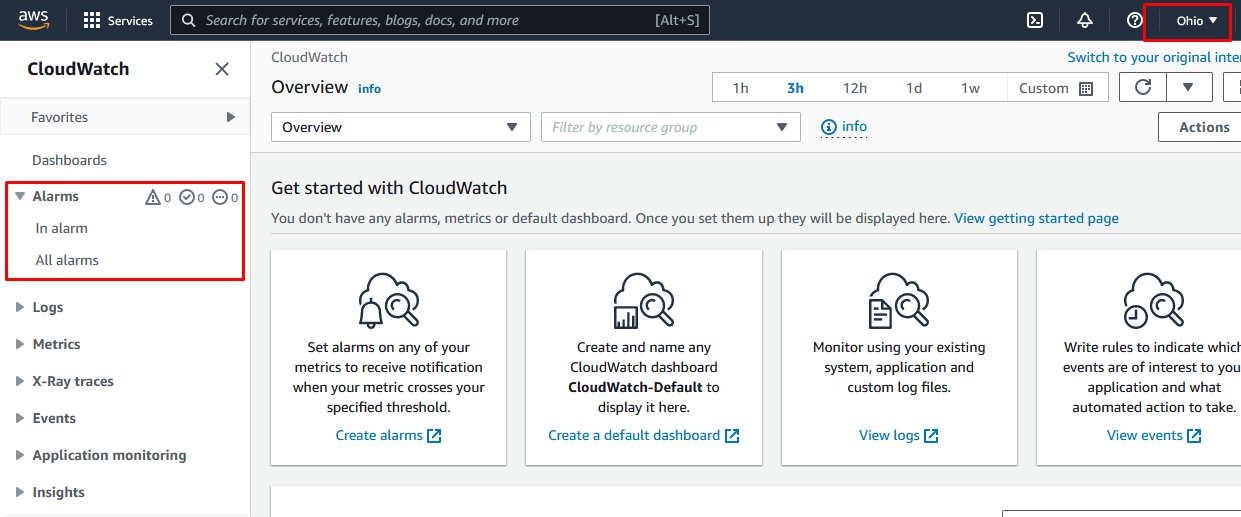
Note: The option to create a CloudWatch Billing alarm is only available in N.Virginia(us-east-1) region and not in any other regions.
Step 6:
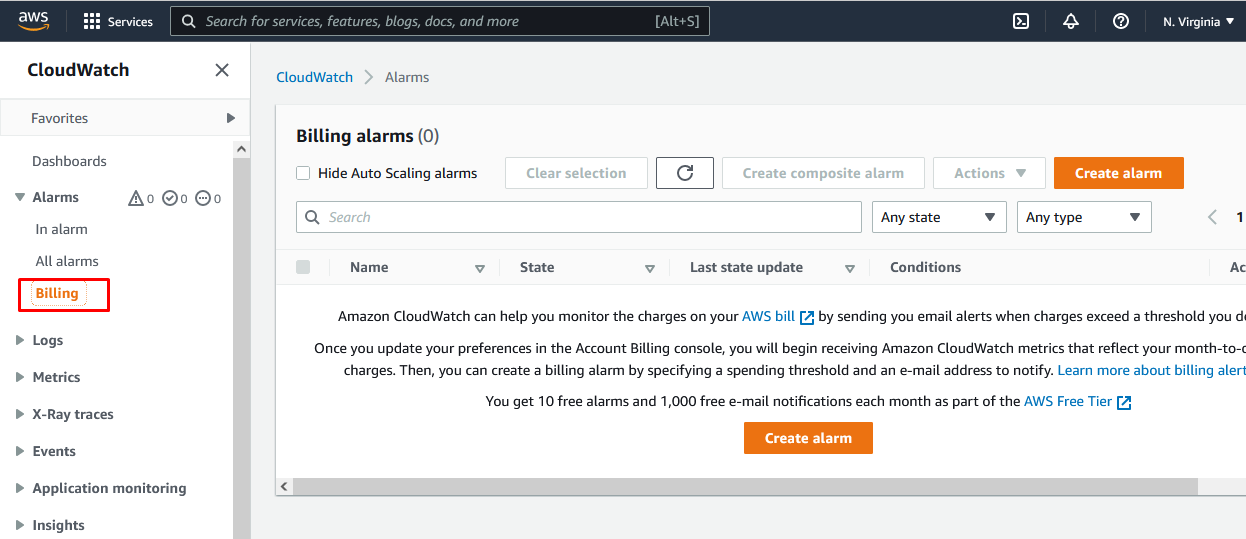
Switch to the N.Virgjnia region from the Ohio region by selecting the same in the region dropdown on the top of the right side of the AWS Console. Now we will find the Billing option under Alarms.

Step 7:
Click on the Billing option. The Billing Alarms dashboard will appear.
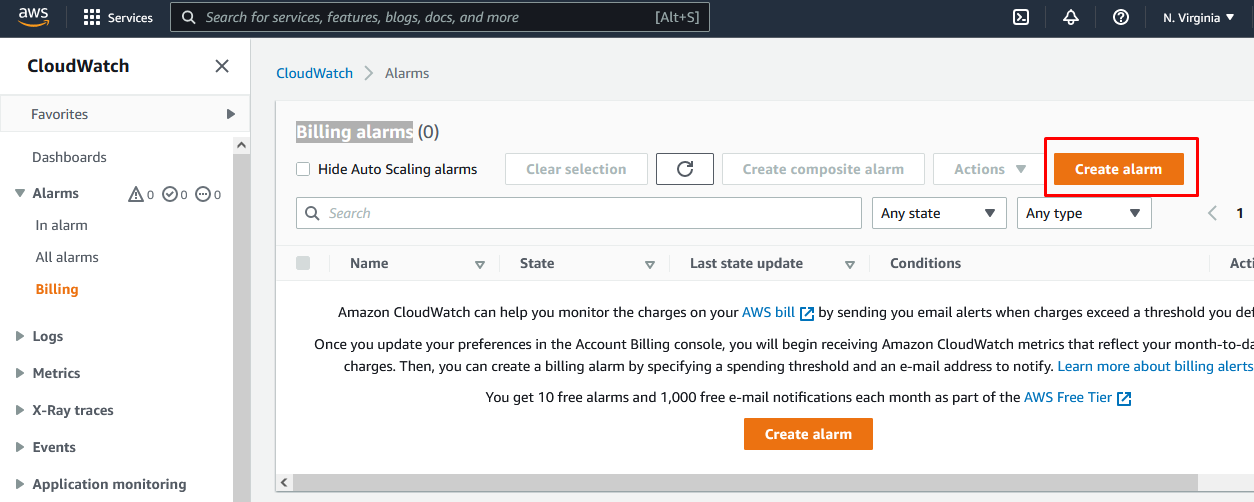
Step 8:
In the Billing Alarms dashboard, click on the Create Alarm button.
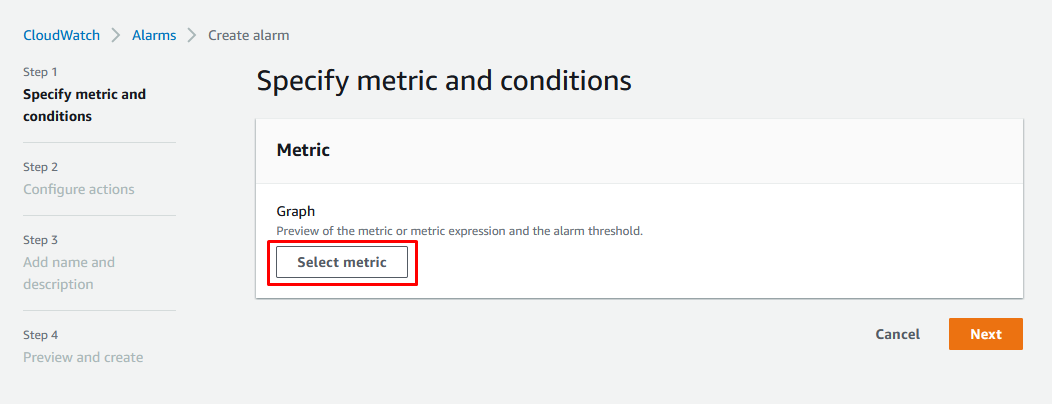
Step 9:
As the first step, we need to “Specify metric and conditions”. Click on the Select metric button.
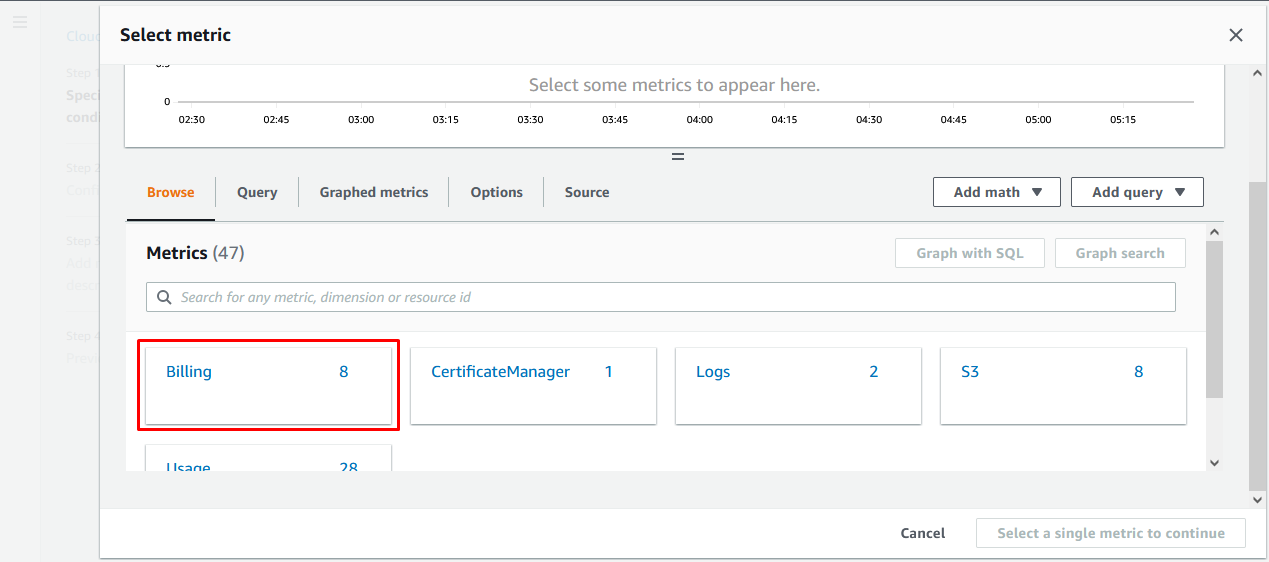
In the Select metric window, Click on Billing under the Metrics section.
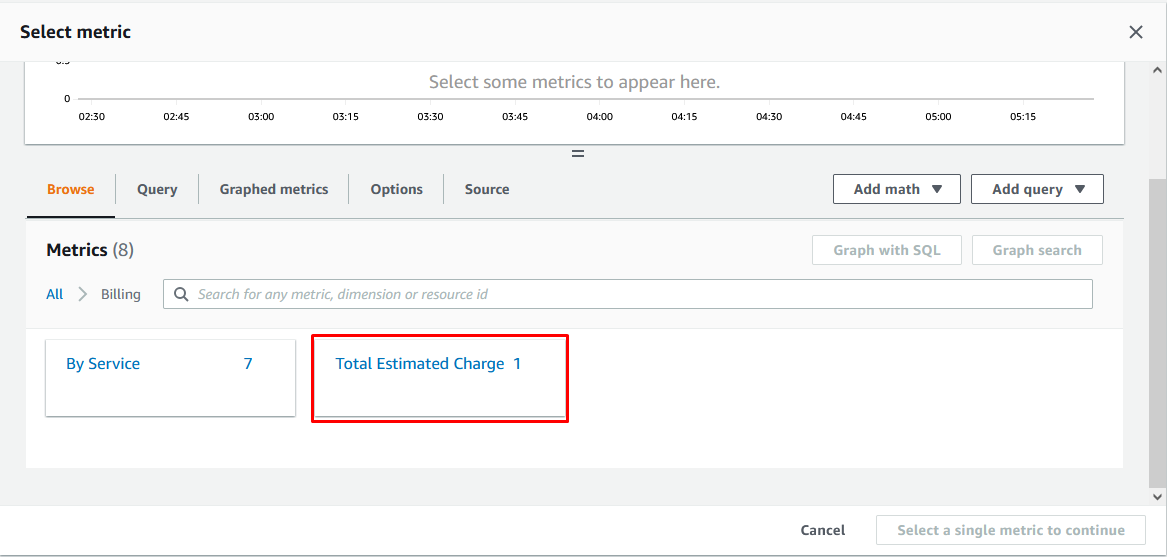
Under Billing, click on Total Estimated Charge.
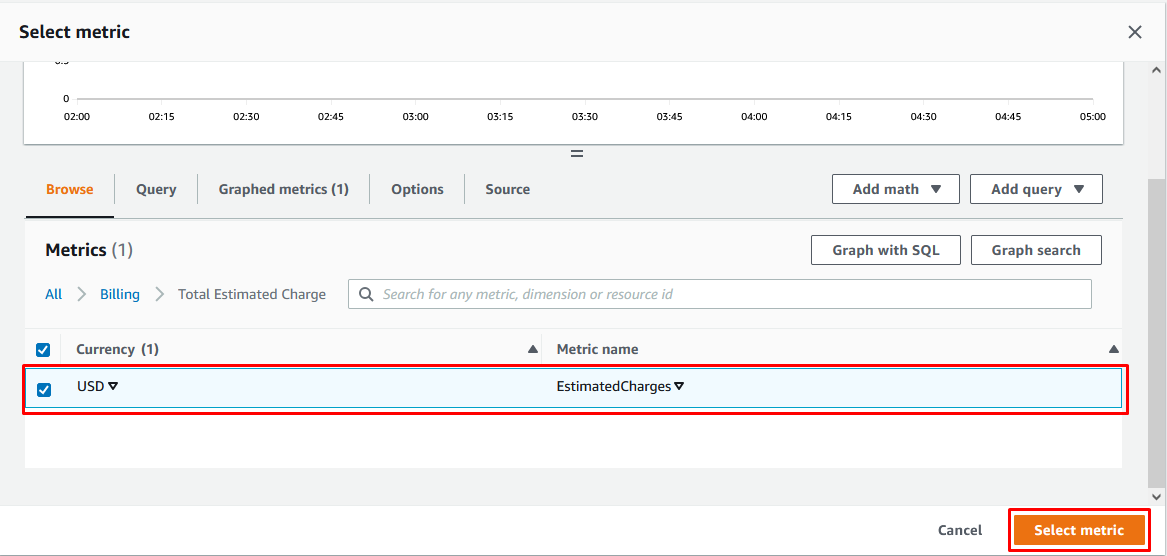
Under Total Estimated Charge, select the USD Checkbox and click the Select metric button.
Under the Metric section, Change the Metric Name if required and leave the other options with the default values.
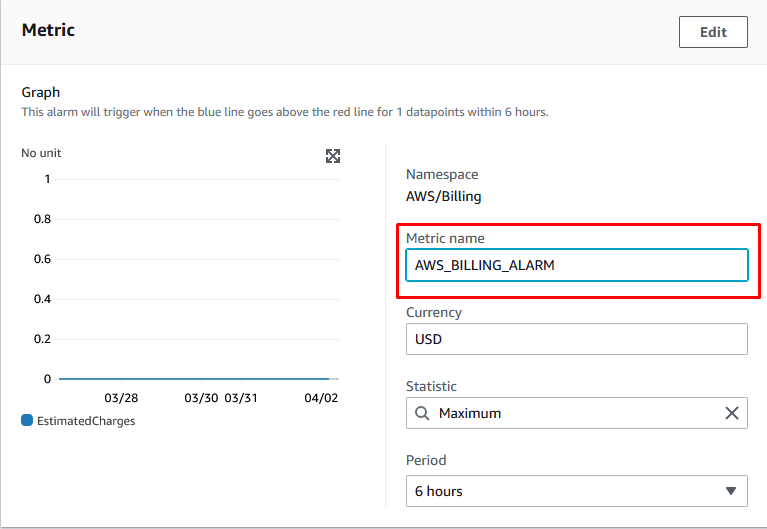
Under the Conditions section, define the threshold value (in my case, it’s 10 USD) and click Next.
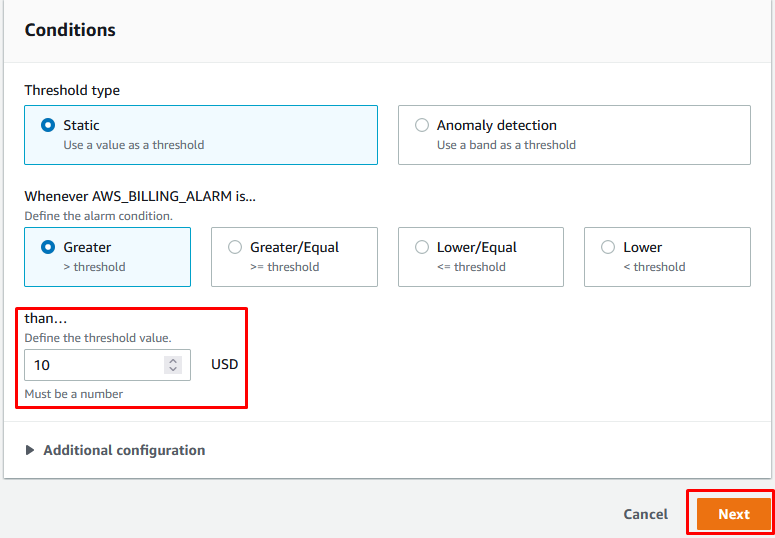
Note: The AWS_BILLING_ALARM will be triggered when your AWS billing amount crosses this threshold limit, the AWS_BILLING_ALARM will be triggered.
Step 10:
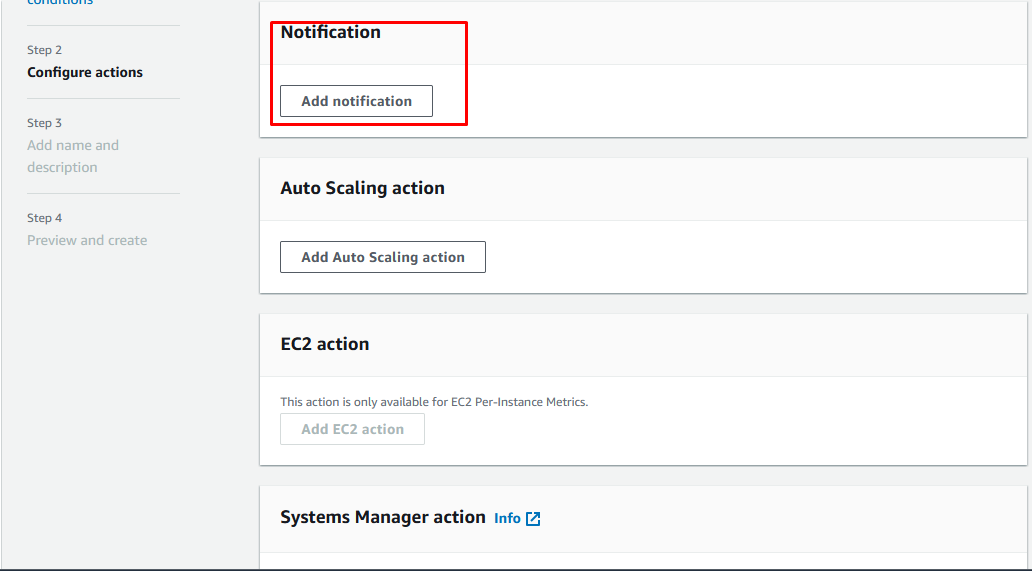
As the next step, we need to “Configure actions“. We can configure multiple actions which are as follows:
- Adding notification
- Auto Scaling action
- EC2 action
- Systems Manager action
Out of these available steps, we are going to select Notification. Click on Add notification under the Notification section.
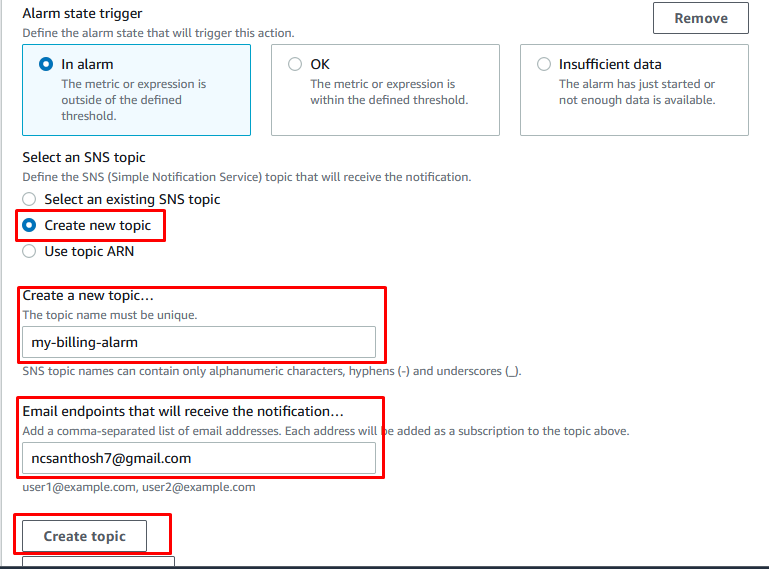
Under the Notification section, choose the below options.
- Alarm state trigger – In alarm checkbox should be selected
- Select an SNS topic – Create a new topic option should be selected
- Create a new topic – The new unique topic name should be entered
- Email endpoints that will receive the notification – The email address should be entered to receive the billing notifications
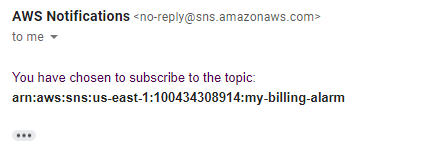
Then click on Create Topic. The respective topic will be created in Amazon SNS.
Then click on Next.
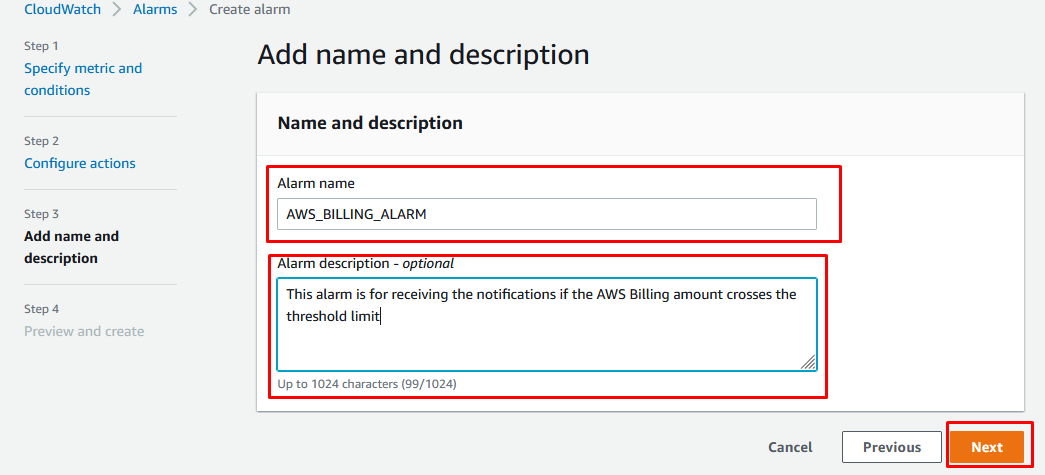
Step 11:
As the next step, we need to enter the name and description of the new alarm.
Enter the Alarm name and Alarm description as per the requirement. In my case, below are the values:
- Alarm name – AWS_BILLING_ALARM
- Alarm description – This alarm is for receiving notifications if the AWS Billing amount crosses the threshold limit
Then click Next.

Step 12:
As the final step, we need to review and create the alarm. Review each and every step and click on the Create alarm button.
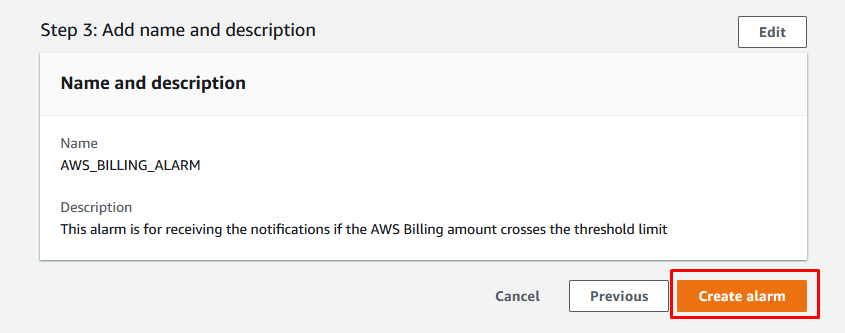
The alarm will be created as per our need.
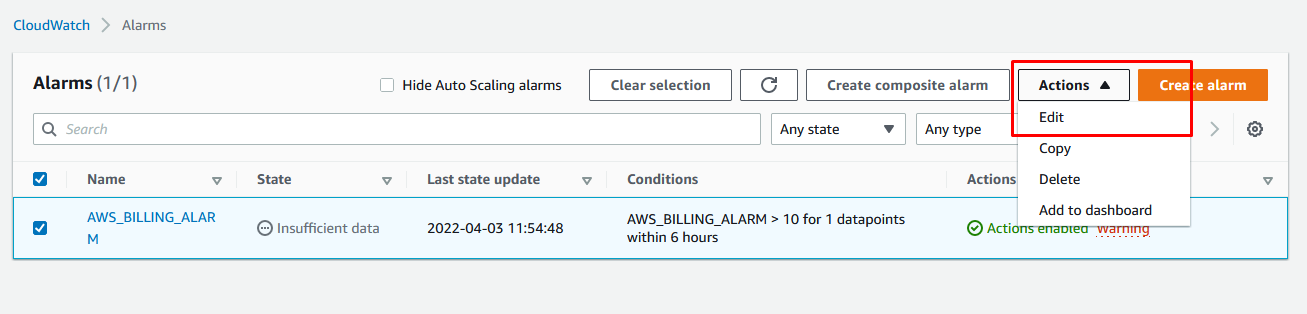
Step 13:
Initially, the alarm will be in the state of Insufficient data because it needs some time to gather the information.

One additional change that we need to do here is to treat the missing data.
Select the newly created alarm and click on the Actions dropdown option and select Edit.
Under Additional configuration, select the option Treat missing data as ignore from the dropdown and click Update alarm.
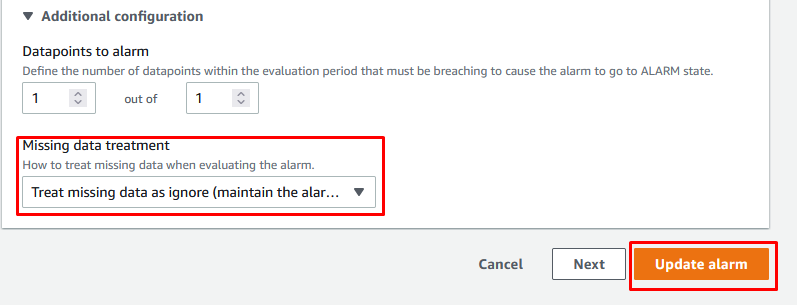
This will help in restricting the creation of false/noisy alerts.
Thus we have created a new billing alarm that will send mail notification if the billing amount crosses the threshold limit.